We are supported by our readers. If you make a purchase, we may earn a small commission at no extra cost to you. Learn More.
If you love to design fabric crafts and also covers of your pillows, the bed sheets, and obviously the curtains, how do you make a recliner headrest cover which suits perfectly on its back?
No doubt, there are many ways people make their headrest covers. You can also buy them from the market as ready-made covers. But sometimes, these amazing crafts are not easily available. Because, people mostly aged 50, 60, or above are more attracted to make their recliners germ-free and extra comfy. And that’s the main reason, you won’t find them easily in every market near you.
But you will be surprised that it is way easier to craft a recliner headrest cover at home.
Worry not, if you are trying it for the first time to overwhelm your grandparent by decorating his/her recliner. Just a few measuring gadgets, along with a box of some threads and needles will be your requirement to artistically make this job done.
In this article, our purpose is all about guiding you about how to make a recliner headrest cover and how many ways there are to make a cover for the back seat.
We are not going to put you in any trouble. It is even pretty much an interesting DIY craft, you will enjoy doing it as your hobby, or during your free time, whichever you prefer.
So, without wasting any time, let’s get started!
Get These Measurement Tools
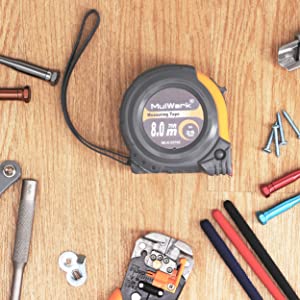
Having appropriate tools for measurements turn your observations precise, and the outcome you get, in the form of a good headrest cover, is more refined. You would have heard about tailor’s rem, safety pins, seam rippers, and bobbins.
But out of these things, you just required a scissor for cutting, measurement tape/ruler for measuring size (width and height) of the headrest, and a sewing machine which is easily available in homes for sewing all the cut fabrics together, to form a cover template.
Basically, the joining of edges of fabric can be done through needles, but to save your time, you can go with a sewing machine. But it is not mandatory. You can also manually stitch all the points in the template if you are not an expert in running sewing machines.
How to Take Measurements?
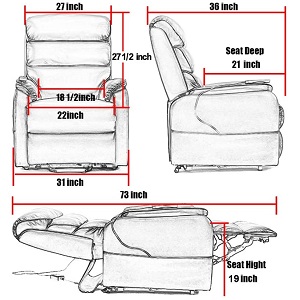
To measure the exact height and width of the recliner, there is no possibility for you to remove the back seat.
Therefore, just pick up a ruler or measuring tape and start taking your observations by estimating the length and from the headrest to the area for lumber (if you want a long cover to stitch). Then measure the width by placing the tape horizontally and while you are summing that up, don’t forget to keep chalk or marker to mark the points of height and width.
Once you are done with taking measurements, only cut the fabric by leaving 1 – 2 inches edges free out of the total sum. It is to design a cover that is not tight to put on and off from the headrest.
Steps Included in Making a Recliner’s Headrest Cover
1- Find a Pattern You Like!
You can see headrest covers are not always simple nor as complex, hence choose one pattern which you can understand easily if trying to stitch it for the first time.
If you’re not sure what to do, I recommend finding a pattern you like. There are many different patterns to choose from, but if you’re not sure, look around the internet for some inspiration!
2- Choose a Fabric and Cut it to Size
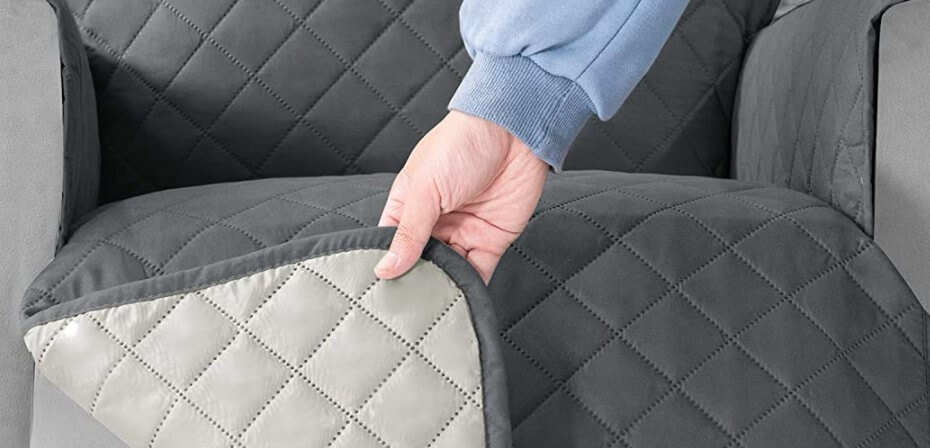
Fabric selection is very important, and make sure you are choosing the fabric or stuff that is soothing, not slipping at the backrest, and soft.
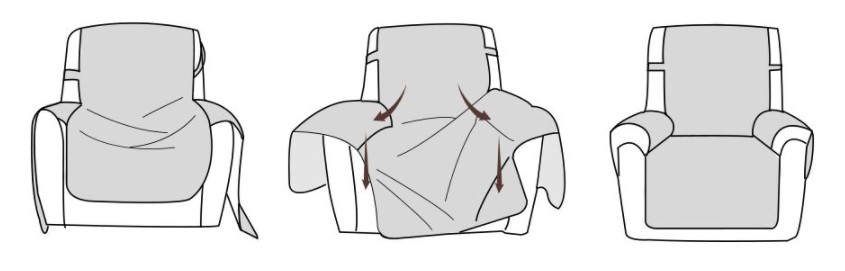
To make a perfect cover for your recliner, you will need to measure it from the bottom of the back to the top of the armrest. Once you have that measurement, add 2-3 inches to that length.
This additional fabric will be used on the sides where you’ll tuck in your cover between the vinyl and the frame of your recliner, which will help stabilize it. Once you have all of your measurements completed, cut out two pieces of fabric using those measurements.
3- Sew Together One Side of Each Piece of Fabric
After cutting out two pieces of fabric, take one side of both pieces and sew them together with a 1/4” seam allowance, making an L-shaped piece. You should end up with a piece that looks like the letter “K”. The other side will be open.
4- Sew a Casing for a Drawstring at One End of Each Piece
Next, take the two pieces and sew a long strip along one side about 1/2” from the edge. You’ll want to make sure it is wide enough to fit your drawstring.
(This step is not mandatory to follow. You can also make a cover without making drawstrings at its bottom to hold the backrest tightly.)
5- Insert the Drawstring
Tie a knot at each end of the string and insert it into the casing you just made on one side of both pieces of fabric (it doesn’t matter which). Stitch along the inner edge of your new casings to secure the drawstrings in place, then clip the threads.
6- Sew the Two Pieces Together
Once you have both casings stitched, simply lay the pieces on top of each other with right sides together and stitch around all four edges using a 1/2” seam allowance. Make sure to leave an opening on one side about 4-6” from either end for turning the cover right side out.
Clip the corners on both sides of your opening and turn the cover right side out through the opening you left. Then, hand stitch it closed to completely finish your headrest cover!
7- Put Your New Headrest Cover in Place and Enjoy!
If you’ve got the DIY spirit, it’s so easy to make your own headrest cover! Which is perfect because they can start to look worn out after a while. You don’t need any fancy tools or skills (unless you want to try something like an invisible zipper!) Just some measuring tape, some threads and needles, and your choice of fabric.
Frequently Asked Question (FAQ’s)
How to clean the recliner backrest cover?
You can simply wash the dirt fixed in the backrest cover in the washing machine by mixing any detergent, washing powder, or a mild soap that has no fastly reacting chemicals.
Is slipcover better than backrest cover for recliners?
It is good but not always. Since recliners are made to recline back and extend their height then a normal sofa chair cannot be extended and remain on its specific stalk position. Therefore, slipover can be broken if the recliner stretches from the armrest, or rotates from the base, or reclines backward!
Why cotton fabric is good for headrest cover?
Cotton is soft and breathable which also makes it lighter to handle and sew and cut. That is why, instead of choosing any wool fabric or something really hard, choose cotton fabric for the headrest cover.
Conclusion
So this was a quick guide for you about how to make a recliner headrest cover if you have not ever made it before. We observed very closely the simple DIY method to present you with a digestible scheme for making the cover that can be plain or with drawstrings to pouch the backrest.
We hope by following these measurements and steps for making a cover for your grandparent’s recliner, you will feel no hassle throughout the process.